Wednesday 30 May 2012

A Twelfth Century HOTT Campaign

Vikings Fight At Sunset
This post is a dump of one from the old Stronghold, and was written by Ruarigh Dale who was proposing to convert a solo DBA campaign set in he 12th century to being an HOTT campaign instead. These are his thoughts and lists.

I actually thought it was interesting that he has adopted the same approach I use for my Epic 40K armies - 12AP of compulsory troops backed up by a free pick from a fairly comprehensive list of additional ones.

But enough of me. I will hand over to Ruarigh:


The campaign involves the following armies:

Vikings 1 (Orkney)
Vikings 2 (Man)
Norse-Irish
Scots Isles and Highlands
Anglo-Norman
Scots Common

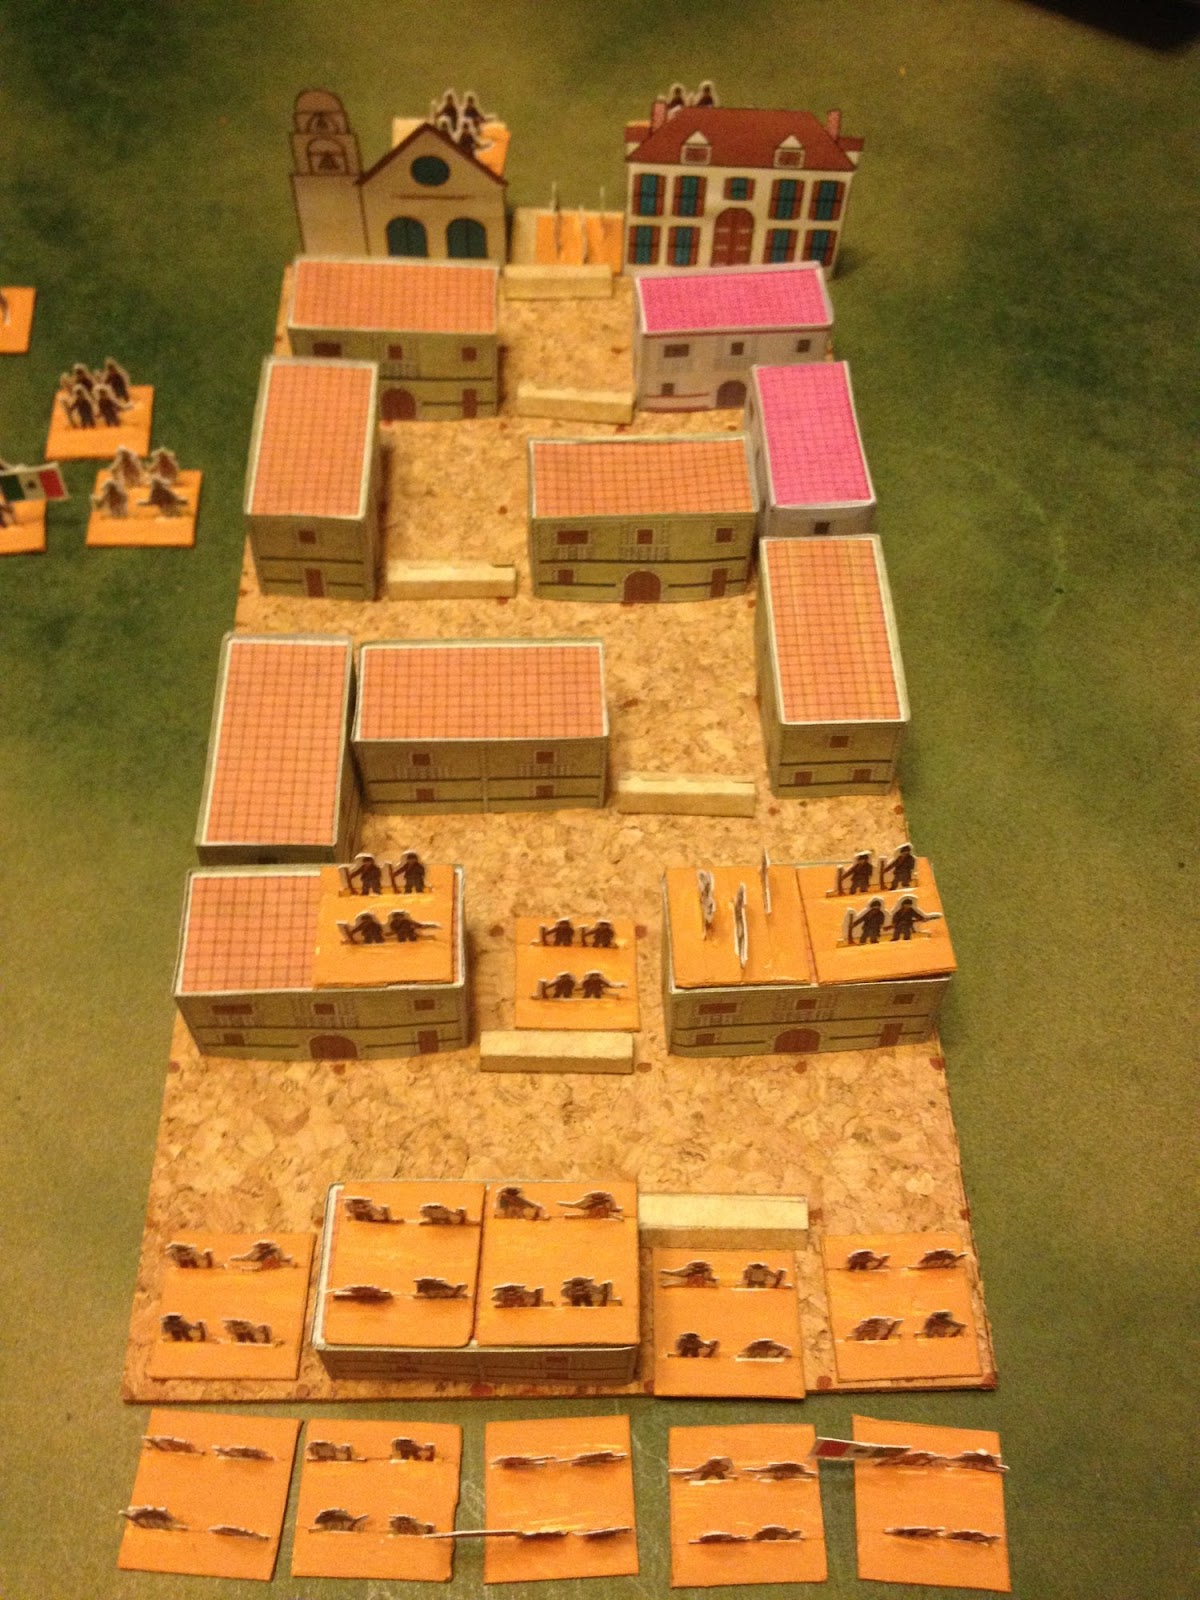
Viking Against Irish
I have listed a core force of 12 AP that must be taken and then the options list the maxima allowed of the different troop types. The aim of the core army is to retain the flavour of the historical army and the options allow for fantasy elements as well as the more mundane troop types. Also, if anyone has the names for the appropriate kings or generals, please let me know. It is always more fun to think that your knights have just trampled King Bill of Braintree into the mud than just saying that the enemy lost a blade element.


Orkney Vikings

1 Hero General @ 4AP (Svein Asleifarson)4
4 Blades @ 2AP8

Options:
6 Blades @ 2AP
2 Shooters @ 2AP
1 Lurker @ 1AP (sneaky Vikings with swords or Vikings with bows)
1 Magician or Paladin @ 4AP (Saint Magnus)
1 Water Lurker @ 1AP (Selkie)
1 Sneaker @ 3AP (Vikings with torches going to burn something down)

Notes:
Svein Asleifarson was probably not really a hero but Orkneyinga saga has a large proportion written from his perspective. Judith Jesch has argued that he may have instigated the writing of those parts. This automatically makes him a hero in my book.

Saint Magnus was murdered in 1116. He may be fielded as a Magician if the desired effect is the demoralisation (bespelling) of the enemy by his appearance or as a Paladin if the goal is to motivate your own side. Once he has been defined as one troop type he must remain as that until he dies in battle and is replaced. This note applies to all other saints in these lists too.

Players who field the "sneaky Viking" Lurker must also provide a piece of bad going with an outside toilet on it.

The Selkie is a seal-person.

Burners are a traditional part of the Viking saga. Orkneyinga saga has numerous examples of people being burnt in their homes.

This list does not include berserkers because I cannot remember any mention of them in Orkneyinga saga at this period.

Man Vikings

1 Blade General @ 2AP (Olaf the Red)2
5 Blades @ 2AP10

Options:
6 Blades @ 2AP
1 Warband @ 2AP, Behemoth @ 4AP or Beast @ 2AP (Berserkers)
2 Shooters @ 2AP
1 Lurker @ 1AP (sneaky Vikings with swords or Vikings with bows)
1 Sneaker @ 3AP(Vikings with torches going to burn something down)
1 Hero @ 4AP
1 Magician @ 4AP(Mannanan mac Lir)

Notes:
Berserkers may be fielded as one of the listed troop types but once defined, this type may not be changed until they have died and are recruited again.

Mannanan mac Lir is a celtic god, after which the Isle of Man was named. He is included to reflect the combination of Norse amd Celtic culture on that island.

Orkney Viking notes also apply to this list for Lurkers and Sneakers.

Norse-Irish

1 Spear or Warband General @ 2AP2
5 Warband @ 2AP10

Options:
3 Warband @ 2AP
3 Blades @ 2AP
2 Lurkers @ 1AP
1 Magician @ 4AP
1 Hero @ 4AP

Notes:
The General's element should be defined and remain as that troop type until it dies and is replaced, when it may be changed.

The Magician may be a Sidhe wizard or witch.

The Hero element just seems appropriate as an option.

Scots Isles and Highlands

1 Blade General @ 2AP (Somerled, Lord of the Isles)2
1 Blade @ 2AP2
2 Shooters @ 2AP4
2 Beasts (Highlanders) @ 2AP4

Options:
3 Blades @ 2AP
1 Lurker @ 1AP (sneaky Islesmen)
1 Water Lurker @ 1AP (Kelpie)
4 Beasts @ 2AP (Highlanders)
1 Hero @ 4AP

Notes:
The classification of Highlanders as Beasts just seems to make sense. It is not intended as a slur, and those who object could always field them as Warband. I fancied a change.

The Water Lurker is a Kelpie or water horse. This critter would come onto dry land in the form of a horse, lure people onto its back and then dive back into the water, thus drowning them. Or it might just be a sheepdog swimming about!

Anglo-Norman

1 Knight General @ 2AP (Prince Stephen)2
3 Knights @ 2AP6
2 Spears @ 2AP4

Options:
1 Shooter @ 2AP (Crossbows)
3 Knights @ 2AP
1 Paladin @ 4AP (standard on wagon)
2 Spears @ 2AP
1 Artillery @ 3AP

Notes:
The wagon from the Battle of the Standard should probably be fielded as a Paladin, but might be fielded as a Behemoth if you fancied rolling it down a hill at someone.

I was very short of ideas for this one as you can maybe tell.

Scots Common

1 Knight General @ 2AP (King David I)2
5 Spears @ 2AP10

Options:
1 Shooter @ 2AP (Bowmen)
1 Lurker @ 1AP (Spider)
6 Spears @ 2AP
1 Paladin or Magician @ 4AP (Saint Kentigern)
1 Sneaker @ 3AP (Scots bravely surrounding a house after dark with fire and sword)
1 Artillery @ 3AP

Notes:
The Lurker is a persistent Spider.

The notes for St Magnus also apply to Saint Kentigern, who was praised for granting victory to the Scots at Renfrew against Somerled, Lord of the Isles.

The Sneaker element sounds like borderers to me.

The Campaign.

This is played on a standard 6-player map with standard campaign rules or you could construct an area movement map of the areas depicted. You should note that large parts of this campaign involve sea crossings.

Each player chooses their army composition at start and must stick with that composition unless elements are lost in battle or sea crossings. When it comes to replacing elements, players must first add elements from the core troops to make the army up to the numbers specified in the core lists before choosing from the optional lists.

For solo play, I use simple diplomacy rules as found on the Fanaticus site. Each army rolls a die for its relationship to each other army. 1/2 is hostile, 3/4 is neutral and 5/6 is friendly. Where anomalous results occur (e.g. one army is friendly to another and the other is hostile to the first, both results are adjusted towards neutral). These numbers determine what you must roll over to attack another nation or under to provide an allied contingent. When checking to see who a nation will attack, always start with the worst relationship. Friendly nations may roll to see if they are allowed to pass through each other's territory. Relationships can change with time.

In addition to the diplomacy rules, I also rate generals according to a system for non-player generals found on the Fanaticus site. This involves rolling to see if they are rash, incompetent, competent, etc, and will decide when a general will try to invade another. E.g. a rash general will always try to invade another nation (ie test for it), even if it means crossing the sea in Spring or Autumn. this can have unfortunate effects, as the Orkney Vikings found in the DBA version of the campaign. In one year they lost their entire army due to poor sailing and being out of supply because of a rash general. When a general dies, you reroll to see what type of general replaces him.

Sunday 27 May 2012

WW1 - The Old And The New

I used up the last of my hair-rollers to make a few more stands for the Pz8 WW1 divisional rules - German and British cavalry:


I also made a couple of A7Vs for the Germans; I may make another British Mk IV/V and paint it in German colours as well, as the Germans tended to use captured British tanks. Oh, and although you can't really see it I painted the tracks on the British tanks, and put a coloured dot on all troop bases to make identifying their nationality easier - red for the British, white for the Germans.

Now I have to see if I can source some more hair-rollers of the same design I have been using. The ones I used for this project (and I did everything with 2 1/2 rollers, in case you were interested) were the last of a batch I bought 25 years ago when Andy Callan first published his classic 'Hair-Roller Armies' article in Miniature Wargames. I used to have a pair of armies for the Zulu Wars, but they never got used because, at the time, I couldn't come up with a suitable set of rules. Now, of course, I can think of a number of ways of using them, but the armies got binned years ago as part of a periodic tidy-up.

Anyway, I'm hoping the design I used is still around and available in Australia.

After playing the game I wrote up yesterday, and a few others covering slightly different scenarios (these games play fast) I am considering some rules tweaks:

(i) After all assault totals are determined, the attacker rolls a dice: on a 1-2 they subtract one from their final score and on a 5-6 they add one. This makes all assaults slightly more unpredictable, especially ones which don't involve artillery and/or MGs; at present these assaults have no random element at all.

(ii) If a square is assaulted more than one during a player turn, it suffers a -1 from its defence total for each assault after the first. At present you can't co-ordinate assaults from different squares; this change allows an attacker to put a square under pressure through multiple attacks.

In addition, I have the defender declare how many AP they are adding in support of an attack before the attacker does; AP are a tricky resource to manage, especially for the attacker, and this gives them a very slight edge in that respect.

Saturday 26 May 2012

Saturday Afternoon On The Somme

The British Army ripped off GW's Land-Raiders
 in order to gain an advantage on the Western Front.
GW sued General Haig
Well, I reckon producing two armies from scratch and fighting a battle with them in 24 hours is reasonably impressive ...

On Thursday evening I downloaded a collection of two-page wargames rules from the Panzer Eight site. In amongst them was an interesting looking set of rules for fighting big WW1 battles; each base equal to an infantry battalion or a tank/MG company. From a read through it looked like the simple mechanisms contained a game which was about juggling limited artillery resources and making sure you had reinforcements in place to exploit or continue assaults. I was intrigued.

I also lacked any suitable WW1 forces to try them out with.

Now I could have just cut up some cardboard counters and gone with those, but where's the fun in that?

So yesterday afternoon I set about producing two armies for the game, from scratch.

The game uses a square grid, of a fixed size - 6 squares wide by 8 deep. The reverse of a couple of the cork tiles I use for 'Struggle Against Everything And Everybody', gridded up into 5cm squares, gave me that. This would allow me to base units for the Pz8 rules on 2cm squares, and still have them looking right.

Now, like most people, I don't have WW1 figures just laying around. But I had card and, more importantly, I had a few plastic hair-rollers; plastic cylinders with rows of spikes that, if viewed with the eyes of a wargamer, look like ranks of soldiers. I won't go into details about how I made things, but I chopped up 1 - 1 1/2cm sections of hair-roller to make infantry bases, a few small offcuts to make MG crews, with the MGs being grains of rice, and layered mounting board to make tanks. Most of the initial chopping and glueing was done on Friday evening, before a session of ferrying children around to youth groups, then I started painting, giving up just after midnight. This morning I finished painting the infantry, and built most of the tanks, having settled on a suitable design the evening before. I also came up with a reasonable design for the MGs and built those. Paper terrain, including all of the trench and barbed wire pieces needed, was downloaded from the Panzer Eight site, glued to card and left to dry overnight, then cut out this morning.

By 2pm this afternoon I had 24 infantry and 6 MG bases for each of a German and British army, 6 British tanks, plus plenty of trenches, barbed wire, bunkers, shellholes, woods and villages. It was all rough and ready, but it was ready to use.

And so I played a game.

I'd produced the sample 1916 forces given in the rules (with some extra infantry for the Germans so that they could be the attacker from time to time), so played a game using those. MGs and tanks are assigned based on a D6 roll; I rolled two dice and selected the higher roll, so both sides had plenty of 'toys' to support the infantry with.

Here's the British army - 24 bases of infantry, 6 tanks and 4 MGs. Remember that each base represents a battalion or a tank/MG company, so that's a lot of troops:


Against them, the Germans had 12 bases of infantry, plus 6 MGs:


Both sides had 18 sections of trenches, twelve sections of barbed wire and three bunkers. The British defences were really just to deter German counter-attacks. Here's the battlefield; both sides set up their defences in their half of the board, but the British went for a clear space in their front row so they could mass troops for the attack (defences limit how many units can be placed in a square). The Germans went for a single bunker in their first line, with two in the second, the aim being to defend those key points rather than try and cover the whole width of the board. One of the German bunkers was in a village as well:


The first part of the game was the preliminary bombardment. The British expended half of their artillery point (AP) allocation on this, hoping to knock out the bunkers and the surrounding defences. Here's the allocation; each counter represents one die roll:


They rolled badly; when the smoke and debris settled only one section of trenches in front of the forward bunker had been destroyed:


As the defender the Germans placed their troops first. The bunkers were occupied by MGs, and MGs covered the flanks as well. A few infantry bases were held back in reserve, to plug any gaps:


The British massed for the attack; in the centre a formidable group of tanks faced the forward bunker, whilst simple massed infantry was directed at the rest of the defences:


Here's a close-up of the tanks:


With lots of German MGs in play, and the preliminary bombardment having been so useless, the British plan was to capture the German first line as rapidly as possible with as many AP thrown at it as needed. Unfortunately the Germans were able to match their artillery gun for gun. In the first assault of the game, the British tanks attacked the forward bunker - four AP committed in support, but the Germans matched it with 3. A draw saw both sides lose a unit; a lot of resources used for a stalemate:


This was the position at the end of the first British turn. On the left a group of tanks had overwhelmed the defenders of one trench, whilst on the right infantry had done the same; British troops were now in front of all three German bunkers. On the far flanks the German MGs had held off the British assaults, inflicting heavy casualties:


The second turn saw a renewed assault on the German forward bunker, with both sides having reinforced their position with infantry units. Again, despite lots of shelling, the bunker remained in German hands:


On their left the British made a concerted effort to destroy a German MG company. They failed, losing most of the attacking infantry in the process:


A similar attack on the right saw more success:


On the third turn the tanks finally took the forward bunker:


But on the British left the German MG still held up the advance, and it was now reinforced by some infantry:


This was the position at the end of the third turn; the British had taken all of the German first line, except for that one stubborn MG position on their left. But the assaults had been costly and they were pretty much out of AP. It was obvious that there was no way they could crack the bunkers in the second line:


The fourth turn saw the tanks combine to assault the German MG position. The Germans expended the last of their artillery in support ...


And drove off the tanks!


Both sides were now out of artillery support and, finally, on the fifth turn the British took the German MG position with a combined tanks and infantry assault:


There was little action after the fifth turn; the British were too weak to attack any of the remaining German positions, so capturing the second row was out, but the Germans lacked the manpower to launch a counter-attack - most of their strength lay in powerful, but static MG positions. At the end of the sixth turn the end of game was rolled, leaving this position:


The British right. The German bunker is surrounded, but without artillery or tank support the British stood no chance of taking it; the rules do not allow units in different squares to combine in assaults:


The British left; casualties have left them looking a bit thin on the ground:


There were few troops of either side in the centre. The British actually have a clear run through the German lines, but with occupied German bunkers on each side it's not a position they can exploit:


The British casualties; half of their infantry and tanks. The 8 infantry and 2 tanks in the foreground were all lost trying to take the one German MG position in front of the British left flank:


The German casualties; about 75% of their force:


By occupying the German first row the British scored an Indecisive Victory. The forward bunker had proved a tough nut to crack, and a single MG position had basically consumed most of the British resources. But I think it was a mistake to use so many APs on the preliminary bombardments; they would have been better used supporting assaults on the positions rather than trying to remove the positions before the battle started.

The rules gave a very enjoyable and desperate game, and I shall look forward to trying them again. there are a few interesting looking scenarios around as well, some of them covering actions away from the Western Front.

You can get the rules from the Panzer Eight site HERE

Thursday 24 May 2012

Elves And Inuit

Another Gong Garage Gamers report. We played HOTT; Geoff, Peter, Dave and myself played a 48AP game featuring High Elves against Dark Elves, then Peter and I played a 24AP game with my Inuit matched pair.

The Elf game - obligatory (at the moment) fish-eye view:


And a more conventional shot:


Elves close:


Oh dear - one of my Dark Elf Magicians is surrounded and killed:


 Charging Elves:


In the centre the Dark Elf Spears didn't fare well against a charge by High Elf Knights:


The Dark Elf left flank was threatened by Knights and a Hero:


The right flank was a bit of a mess:


Another view of the threatened left flank:


Not much else to say; the Dark Elves were outflanked and outfought, barely troubling their opponents. A High Elf victory.

Geoff and Dave left at that point, so Peter and I got out my 15mm Inuit matched pair. The Inuit tribe is in the background, and facing them is the sinister Inland Dwellers of Etah:


The Inland Dwellers have a God:


And he's good for blocking recoils. Whilst wily Inuit hunters killed Etah's Beasts elsewhere on the field, the God helped destroy the Inuit general and their shaman to pick up a fairly swift victory:


I might feature the Inuit matched pair on this blog at some stage.

Wednesday 23 May 2012

The 13 Clocks


Time to maintain the HOTT content of this blog, since HOTT is supposed to be its primary focus. This is another article rescued from the original Stronghold. It is pretty much as John wrote it; I have merely applied a deft editorial hand - that means any errors in spelling or grammar are probably mine.


‘The 13 Clocks’ by James Thurber
Army Lists for ‘Hordes of the Things’ 
By John Whitbourn


First published 1951. Original illustrations by Mark Simont, but there is an edition with illustrations by Ronald Searle. This post uses pieces by both artists, culled from the 'net via the offices of Google.

Naturally, I have excluded many plot revelations and denouements for the benefit of those who have the pleasure of reading this book yet to come. You can read about it HERE of course.

SETTING

Once upon a time, in a gloomy castle on a lonely hill' (there is an evocative picture as a frontispiece).
I’d always imagined the book to be circa 18th century set, but in the absence of gunpowder references and from the general appearance of Searle’s illustrations the high Renaissance seems more likely.

Within the Castle time within is frozen at ten to five (accounts vary as to whether am or pm). Either way, it is always Then, but never Now. The temporal concept, 'Then', at one point materialises as a vulture and departs the Castle, ushering in 'Now'.

The castle’s windows are described as ‘Gothic’ and its stairs are made of iron. The main ‘black oak’ audience room at least is accessible via secret passages. Lances and shields hang on its torch-lit walls.

A ‘deep bell’ in the castle signals alerts.

In a terrible security lapse, climbing vines permit unauthorised access to some chambers by the intrepid.

The Castle’s dungeon contains horrible things including a (dead ?) thing without a head, plus ‘amusing’ bats, spiders and snakes. I’ve collectively termed them‘Dungeon Beasties’.

The world of the 13 Clocks is evidently a patchwork of islands collectively called ‘the thousand islands of the ocean seas’. The story’s setting is not named as ‘Coffin Castle’ until the penultimate page! Other named islands include: The Blessed Isles of Ever After, Yarrow and Zorn. ‘Good’ King Gwain of Yarrow is known to hunt wolves in woods on Coffin Castle Island although Yarrow is ‘many leagues’ away (and halfway from Coffin Island to Zorn).

Incidentally, Zorn lies 33 days travel by sea from Coffin Castle island.

Other islands are described as being ruled by kings and queens, whereas Coffin Island merely has a Duke. However, no higher allegiance owed by the Duke is ever mentioned and Coffin Castle is described as ‘his kingdom’ by the spy Hark.

The Duke ransacks ships in the vicinity and raids other islands. Coffin Castle’s island (it is never otherwise named) contains no deposits of precious stones - hence perhaps the Duke’s piratic tendencies.

Religion on the Island is unmentioned other than a reference to St Wistow’s Day. Taken in conjunction with reference to priests and monks, the thousand islands of the ocean seas’ are presumably nominally Christian.

There is a town below the castle, containing inns and taverns, including one called ‘The Silver Swan’. Is patrons include: 'taverners, travellers. tale-tellers, tosspots andtroublemakers'.

There is a town clock which strikes the hour. Also mentioned are dogs and citizenry in velvet gowns - the latter implying a degree of prosperity. A Town militia is not an unreasonable assumption given the existence of pirates - even if they are their own pirates ! In the army lists below I've assumed at least a portion of the militia could be swung to rebel against the Duke’s less than enlightened rule.

A ‘cool green glade’ leads down from the Castle to a harbour, where the Duke presumably keeps his ship(s) and inter-island trade is conducted.

Forests on Coffin Island contain wolf traps and therefore, logically, wolves. Other parts of the island are farmed (and ploughed by the dragging points of stars - in whose smoking furrows purple-smocked peasants sew seeds). Meadows are also mentioned, possibly implying rivers or streams.

The climate is not specified, although tangerines are referred to by Hagga, as is chocolate by the Duke. Either the local climes permit either/both or there is substantial international trade.

PEOPLE, THINGS AND PERSONAGES

The Duke

The ruler of Coffin Castle (only named as such on the penultimate page ) is ‘a cold and aggressive Duke’. He is described as gaunt, six feet four and forty-six and ‘even colder than he thought he was’. His voice is like air dropped on velvet. He wears jewelled gloves (to cover disfigurements), one eye is covered a velvet patch (lost as a youth to a mother shrike bird he was going to maul) and the other glitters through a monocle. He limps due to his youthful addiction to place-kicking pups. He is armed with an apparently two edged sword concealed in a cane, which is put to frequent use to ‘slit people from their guggle [stomach] to their zatch. [throat]’ He has slain eleven men merely for staring at his gloved hands. When not engaged in homicide or piracy (he raids other Island Castles to kidnap inhabitants and plunder ships), the Duke amuses himself with torturing and killing animals (frequently mentioned in the tale), murderously thwarting suitors for his niece’s hand or in ‘thinking about beetles’.

In sum, 'His nights were spent in evil dreams, and his days were given to wicked schemes'. You get the picture. He also believes he has slain Time in his castle. Though avaricious for jewels, the Duke hates pearls, thinking them made of fish.

The Duke memorably sums himself thus: ‘We all have flaws … and mine is being wicked.’ For all his faults he has a way with words and a certain admirable bravery.

The Duke commands obedient ‘Varlets’ who can appear without word or sound to feed his enemies to a gaggle of voracious carnivorous geese who live in the Castle courtyard. Apparently, the geese relish such meals. Elsewhen, they subsist on hunting snails.

Saralinda

The Duke shares the Castle with his niece, Princess Saralinda, who is tall and 20 years old (going on 21). She wears freesias in her dark hair and is beautiful beyond compare. Her mere presence can light up a window like a star, permitting the Castle to be seen from afar by night. She floats like a cloud, her voice is like faraway music etc. etc. Even the Duke holds up his palms to her as if to warm them by her sheer gloriousness. An illustration depicts her as a swan-necked high-medieval princess.

A witch’s ‘tiny’, ‘clever’ and ‘awful’ spell has restricted her speech in the Duke’s presence to just ‘I wish him well.’ However, even then she can speak a silent language with her eyes. She also possesses intrinsic magical powers which can, for instance, imbue a rose with direction finding powers, or effect clockwork.

The Iron Guard

The Duke’s ‘Iron Guard’ of soldiers appear as a stream of lanterns when issuing from the Castle at night, but later are described as numbering only 11, including Krang, their captain (described the strongest of them all, and the finest fencer in the world - bar for one mysterious prince in armour who bested him a year before, ‘somewhere on an island’). Perhaps these 11 are merely the inner retinue and Duke’s personal bodyguard.
They are described as bearing spears and armour and move like ‘engines’. An illustration shows them in full ‘lobster’ plate armour redolent of circa 1500, and bearing weird halberd type weaponry. Since Krang is described as a fencer, sword armament is implied. Slingshots are also mentioned in a song, so the Islanders are obviously aware of slingers..

Xingu/Zorn of Zornax

A new arrival on the Island, Xingu the minstrel, ‘a thing of shreds and patches', aspires to marry Saralinda. He is soon revealed as a Prince in disguise, and none other than the ‘mighty Zorn of Zorna’, the youngest son of a powerful and wealthy (but indecisive) King. He is also a mighty warrior who has previously (and anonymously) defeated the otherwise invisible Krang, captain of the Duke’s Iron Guard. Xingu/Zorn is wildly handsome, chivalrous and hugely strong, being able to juggle with an eighteen stone tavern troublemaker, and or carry companions when pressed for time. He also ties a world-renowned warrior into a ‘Turk’s Head’ knot’ which he learned from his sister.

An illustration shows him as a splendidly clad and sword-armed Ruritanian or Renaissance prince.

The Golux

The unfortunately named Golux, who allies himself with Xingu/Zorn, is a unique supernatural trickster and the son of apparently rather ineffectual witch and wizard. Not everyone believes in his existence - for instance a captain of the Duke’s guard, despite 'having been to school'.

He is described as looking like a little ( five feet tall ) old man with wide eyes, a dark beard and indescribable hat. He is 'on the side of good by accident and happenstance’ despite childhood high hopes of being evil.

He has ‘no magic to depend on' but always seems to save the day nevertheless - sufficient to save ‘a score of princes in my time’. He can also do a score of things that cannot be done and ‘has a lot of friends’ and ‘knows a lot of places’.

The Spies

The Duke has a corps of spies. Named members include Whisper, Hark and Listen. They are dressed in black hoods and cloaks and wear velvet masks. Listen is invisible to all. Their loyalty appears to be either fanatical or questionable - which is understandable given that, for instance, ‘spy-in-chief’ Whisper is fed to the carnivorous geese merely for being obliged to mention the hated word ‘mittens’ in a report. Yet he returns willingly to certain death. Conversely, Hark appears increasingly insubordinate, although it is he who uncovers ‘Xingu’s’ true name by searching his quarters in the Town. Hark has black eye-brows.

The Ghosts

The Castle is haunted by an unseen group of ghostly children killed by the Duke in some horrible but unspecified way for sleeping amongst his prized camellias. They now throw ‘insolent’ or 'impudent' purple or black balls decorated with gold stars or stamped with scarlet owls. When trodden on, the balls unpleasantly ‘squutch’ beneath the foot and ‘flobb’ against the wall. They seem linked to the Golux in that these are said to be similar to the toys both parties used to play with. Certainly, the Duke concludes the ghost children on the Golux’s side.

Also, at one point, a unique ‘something very much like nothing anyone had seen before’ trots down the stairs in the castle. Likewise, at another point ‘something that would have been purple, if there had been light to see it,’ scuttles across the Castle floor. Their nature and allegiance are uncertain but the Duke seems unfazed. I’ve presumed their presence is tolerated because of a willingness to serve him and so have collectively termed them ‘Castle Nasties’.

Hagga

Hagga is a magically blessed (or cursed) woman, variously described as in her eighties or thirties. The question remains unresolved even when we meet her. She lives in a valley hut (paradoxically ‘high on Hagga’s Hill’) which naked eye cannot see, ‘over mountain, over stream’, forty-five hours journey from Coffin castle through lightless forest, briar, thorn and bramble via a narrow path uphill all the way.

When she weeps or laughs she can - on rare occasions - produce jewels from her eyes. A previous jewel producing glut before she was sixteen led to the local economy being flooded and economic chaos. Consequently there is or was the death penalty (plus a fine) for making Hagga cry. Subsequently, she has turned a thousand visitors gemless from her door.

The Todal

The Todal is fearsome 'blob of glup', which either ‘gleeps’ or makes a sound like rabbits screaming, and smells of old, unopened rooms or a musty sofa. Later we are informed it is made of lip, feels like it has been dead at least a dozen days and moves like monkeys and shadows. Apparently it cannot be killed. Mere mention of it is enough to turn a soldier’s hair white or a velvet mask grey. It haunts the Duke as an agent of the Devil sent to punish evildoers for having done less evil than they should.

However, since the Duke's evildoing seems to be set at a fairly high and constant level, I've allowed the possibility of the Todal acting in concert with the Duke, but only if Zorn of Zorna has declined its services.

Passing References and Presumptions

There are fleeting mentions of knights like Galahad, Tristram, Lancelot, Tyne and Tora, and of tournaments, wizards using ‘magic words’ and spells, witches, monks and priests, hangmen, dragons devouring damsels, snakes, monsters, whistling comets, owls, sheep and octopi.

There are 'no horses in the stable' in Coffin Castle, and therefore presumably no cavalry available to the Duke. However, the Golux can provide a pair of white steeds at short notice from unknown 'friends'

Given the Duke’s beast-torturing proclivities, one can reasonably assume opposition to him in the form of Outraged Animals. For instance, we are told that some years back a mother shrike bird evened the score by blinding him in one eye. Other, named, victim creatures are: nightingales, puppy dogs and kittens, bats and spiders and mice. Alternatively, as cruel children have been warned by millennia of mothers: ‘the king of the [insert species] will come looking for revenge!’. Accordingly, giant sized regal versions of the relevant species could shown opposing the Ducal forces.

Both witches and wizards are mentioned frequently, usually as journeymen mercenaries hired for specific tasks. They do not seem particularly formidable, although‘Good’ King Gwain of Yarrow is a wizard who can both curse and bless people and turn them into grasshoppers.

Therefore, Magic is evidently prevalent - though capricious - in the Thousand Island World. Even nursemaids can be powerful spell-casting witches.

Relevantly, the spy Hark also observes that ‘there are rules and rites and rituals, older than the sound of bells and snow on mountains.’ Furthermore, he knows that binding spells contain chinks and loopholes to permit right to triumph.

‘The Thorny Boar of Borythorn’ is mentioned as a formidable opponent. However, opinion varies as to whether it exists.

Though they do not ever appear in the book, the heroes’ close links with Zorn and Yarrow (I’ll say no more) raise the possibility of an allied contingent of archetypal knights and bowmen.

SUGGESTED ARMIES

The Duke Of Coffin Island

Stronghold - A gothic castle on a hill OR a symbolic grandfather clock (stuck at ten to five).
1 x Hero General (The Duke) @ 4AP
1 x Blades (The Iron Guard) @ 2AP
2 x Beasts (Castle Geese) @ 2AP
2 x Sneakers (Fanatic Spies) @ 3AP
1 x Spears (Town Militia) @ 2AP
2 x Shooters (Town Militia) @ 2AP
1 x Lurker (Dungeon Beasties) @ 1AP
1 x Hordes (Varlets) @ 1AP

Alternatives:
Behemoth (The Todal*) @4AP, Magicians (Witches/Wizards) @ 4AP, Dragon (Mercenary) @ 4AP, Hordes (Pirate Pals or Town Troublemakers, Sneakers (Castle Nasties) @ 3AP, Beasts (Thorny Boar) @ 2AP

*Only if not used by Zorn’s forces

Prince Zorn of Zorna Liberation Army

Stronghold - Harbour with ship, plus two white horses on quay.
1 x Hero General (Zorn of Zorna) @ 4AP
1 x Cleric (Saralinda) @ 3AP
1 x Magician (The Golux) @ 4AP
1 x Fliers (Then - A Vulture) @ 2AP
1 x Fliers (Outraged Birds) @ 2AP
1 x Beasts (Outraged Animals) @ 2AP
1 x Spears (Town Militia) @ 2AP
1 x Shooters (Town Militia) @ 2AP
1 x Lurker (Ghostly Children) @ 1AP
2 x Hordes (Town Troublemakers) @ 1AP

Alternatives:
Behemoth (The Todal*) @ 4AP, Sneakers (Mutinous Spies) @ 3AP, Cleric (Hagga) @ 3AP, Magicians (King Gwain) @ 4AP Knights (Zorna or Yallow) @ 2AP, Shooters (Zorna or Yallow) @ 2AP Beasts (Thorny Boar) @ 2AP, Hordes (Town Troublemakers) @ 1AP


Tuesday 22 May 2012

SAEaE - Possible Changes

I have been reading exchanges various recent posts on Bob Cordery's 'Wargaming Miscellany'  and David Crook's 'A Wargaming Odyssey' about how to better reflect both quality and numbers in the simple 'Memoir of Battle' games they have been pioneering. I have some reservations at present about the effects being too extreme in a game with low granularity in terms of the ability to change factors, but I shall follow the discussion and read the playtests and see what comes out of it.

It got me thinking about my own 'Struggle Against Everything and Everybody' (SAEaE) rules for the Mexican Revolution. These are based on one of Bob's sets, so changes and ideas proposed for them are potentially applicable. Having a few games of it under my belt (or bandolier) now I wondered if it could stand a few tweaks on similar lines to those proposed by Bob and David.

One issue I am thinking about at present is the relationship between a unit's strength and its combat capabilities. At present the 'Memoir of Battle' rules that Bob and David are trying use strength to reflect how many 'hits' a unit can take, with adjustments for quality - an infantry unit has a strength of 4, for example, but an elite unit may have a strength of 5 and a poor one a strength of 3. Their combat capability - how many dice they roll to score hits - is, however, unaffected by the strength. An infantry unit always rolls 4 dice, whether it is a full strength elite unit with 6 hits, or a poor unit close to breaking, with only 1 strength left. The Morschauser system, on which SAEaE is based gives units a strength, but that also dictates how many dice they roll when in combat; as a unit takes casualties it's fire-power decreases.

I am beginning to wonder if both methods are a little extreme. The first has units fighting at full strength until they are destroyed. The second has units degrading very rapidly as they take casualties, and their fire-power going down by a significant percentage.

In reality, such as it is, units generally don't fight to the last man; at about 15-20% casualties they are ready to give up. High casualty rates tend to happen when lots of units give up at once and the army routs, but for most games we play that's the aftermath, not part of the game itself. So for an infantry unit with an (arbitrary) strength of 4, each 'hit' doesn't represent 25% of the unit being put out of action; it may only represent a 5% loss. To this end there is something to be said for the Memoir method of fire-power being relatively unaffected by casualties; each hit doesn't represent 25% of a unit's fire-power being lost.

Morale is a different matter. If we assume a 4 strength unit 'breaks', and is lost, when all four points are lost, and that this represents a loss of about 20% of its strength. Each hit could, potentially, be degrading its morale by 25%.

So, how can I apply this theoretical (and probably inaccurate) rambling in SAEaE? When cobbling it together I pondered which method to go for - Memoir or Morschauser. I went for Morschauser, partially because the saving roll mechanism gave me more flexibility in terms of applying terrain and range factors in the game. The discussion above leads me to the idea that I could use a mix of both systems.

In SAEaE I differentiate between shooting and close combat., using slightly different mechanisms. Even at one square range a unit can choose to sit tight and shoot, or charge in with sabre, machete or bayonet*. The former is a low risk strategy, which may take time to bear fruit, whilst the latter offers a big win at the risk that you could suffer if things go badly. My assumption is that shooting is based very much on the actual strength of a unit - how many guns it can bring to bear - whereas close combat is based on morale - a unit's willingness to charge against its target's willingness to stand in the face of a determined attack.

So here's what I will try.

Units still have a base strength value. This directly equates to their fire-power - the number of dice they roll when shooting. This doesn't vary significantly with casualties. It's also used as an initial measure of the unit's willingness to fight. This value does go down as the unit takes 'hits'.

So instead of Strength units will have Firepower and Morale. These start with the same base values; 4 for Infantry, 3 for Cavalry, Artillery and Machine Guns. Elite units add 1 to Morale (only), Poor units subtract 1.

Firing: A unit rolls dice equal to its Firepower. If a unit has taken any hits, subtract one from the number of dice.

Close combat: A unit rolls dice equal to its Morale value.

Hits: Hits are taken on the units Morale value only. When it reaches zero the unit is removed.

Example. A Poor infantry unit has a base strength of 4. It's Firepower is 4 and its Morale value is 3. When it shoots it rolls 4 dice, but in close combat it only rolls 3. It takes 2 hits. When firing it now rolls 3 dice - a base of 4 with a -1 modifier for having taken hits. In close combat, though, it only rolls 1 dice; a base morale of 3, -2 for the hits. One more hit will destroy the unit.

I will try this out in the next couple of games, and see how it works.
*But not lance. Apparently the Mexican Revolution didn't see much in the way of lancers.

Sunday 20 May 2012

The Battle Of Cuautla

In May 1911 Mexico was aflame with revolution. In the north troops under Madero and Villa were winning a series of victories that were forcing the president and dictator of Mexico, Porfirio Diaz, to consider his position. In the south Emilio Zapata was also in rebellion. He realised that unless he held major towns in the area he would have little to bargain with at the end of the fighting, so attacked the fortified and garrisoned city of Cuautla. He had 4,000 troops, ill-equipped and unused to the kind of fighting required to take a city by assault. The city was defended by between 350-400 men of the elite Fifth Regiment of the Federal army.

The stage was set for six days of terrible battle, which left the Fifth Regiment decimated and Zapata in control of the city. The battle was fought at close range, with machete and bayonet in many cases, and saw the use of gasoline to burn the Federal troops out of their positions.

I decided to base a  game of 'Struggle Against Everything And Everybody' around this battle, pitting a force of Zapatista rebels against a series of Federal defence lines in the close confines of a city. Rather than fire I decided to allow the attackers to use dynamite; Pancho Villa's troops used this weapon in a similar assault at Ciudad Juarez, blasting from house to house to avoid artillery fire.

I used a very small grid for this game, 5 squares wide by 10 deep (so 15cm x 30cm), with an 11th row holding two objective squares - The Plaza. Ten Zapatista infantry units, with inferior firearms, had twelve turns to take both objectives at the other end of the board. The Federal defenders were determined randomly; the first time a Zapatista unit came within view of each of rows three, five, seven and nine, their occupancy would be determined, with most of the defenders being infantry but the option for machine guns or even artillery. The Plaza was defended by two infantry units, with an artillery unit in the gap between the two objectives.

This was the setup. The first five Zapatista units started on row one, with their places being taken by the remaining five units as they advanced:


Buildings were from the Junior General site. The two buildings with pink roofs were the result of a printer ink malfunction, but it seemed a shame to waste them.

Here's a close-up of the Zapatistas about to begin their assault:


And here's the Plaza. The buildings in front of it are almost certainly defended by Federal troops:


The position at the end of the second turn. The Zapatistas had captured some of the third row by this point, and were starting to fire upon troops defending the next line:


Zapatistas use dynamite to remove a troublesome machine-gun position:


The third line of Federal defence was under attack by the end of the fourth turn:


Not long afterwards the first Zapatista unit reached a position where they could attack the Plaza:


Meanwhile a single Federal unit was still holding out on their first defence line, delaying a couple of Zapatista units:


The high-water mark of the Zapatista attack. Their units were attacking the last line that stood between them and the Plaza, but mounting casualties took their toll and blunted the assault. Any units which broke through and got within range of the Plaza itself were picked off by concentrated fire from the defenders and the artillery. The left flank had done well, having met little resistance, and the centre hadn't had too bad a fight, but the right flank had been held up by two particularly stubborn defenders:


Some of the stubborn defenders on the right - the uniforms are those of the Rurales; I used them because I'd run out of Federals:


The final assaults break on the Federal defences; there were still a few Zapatista units by this stage, but most of them only had one hit left:


The end. The last Zapatista unit made a stand under heavy Federal fire until it was wiped out:


The Zapatista casualty pile at the end of turn 11. Their surviving unit had one hit left and had only advanced as far as the third row:


This was a tense, vicious game, made all the more interesting by the tight, restricted board. The rules held up well.

I will probably try it again with the same set-up, but it's possible that I had the frequency with which Federal units appeared too high, making their numbers a little high. Technically the Zapatistas should be able to concentrate their forces against each defence line, defeating the Federals in detail, but the ticking clock means they can't rely on this as a tactic; they have to push forward with speed.

The Federal defence was helped by two stubborn units on one flank who refused to die, and also their good fortune with initiative; they won it on the majority of turns, allowing them to inflict heavy casualties before that turn's assaults came in.

I'll probably use the dynamite rules again (the Zapatistas had four tokens each of which would give them a bonus in a single close-range firefight or a close assault against a building or allow them to ignore the movement effects of a building). If I wanted to simulate their use of gasoline I might allow them to, once per game, attack every unit in a given row of the board with, say, four dice, ignoring cover. We'll see.

Related Posts Plugin for WordPress, Blogger...